Posted on

Can You Put Vinyl Decals on Textured Walls?

Vinyl wall decal applied smoothly to a lightly textured wall
how to

Can You Put Vinyl Decals on Textured Walls? (The Ultimate Fix)

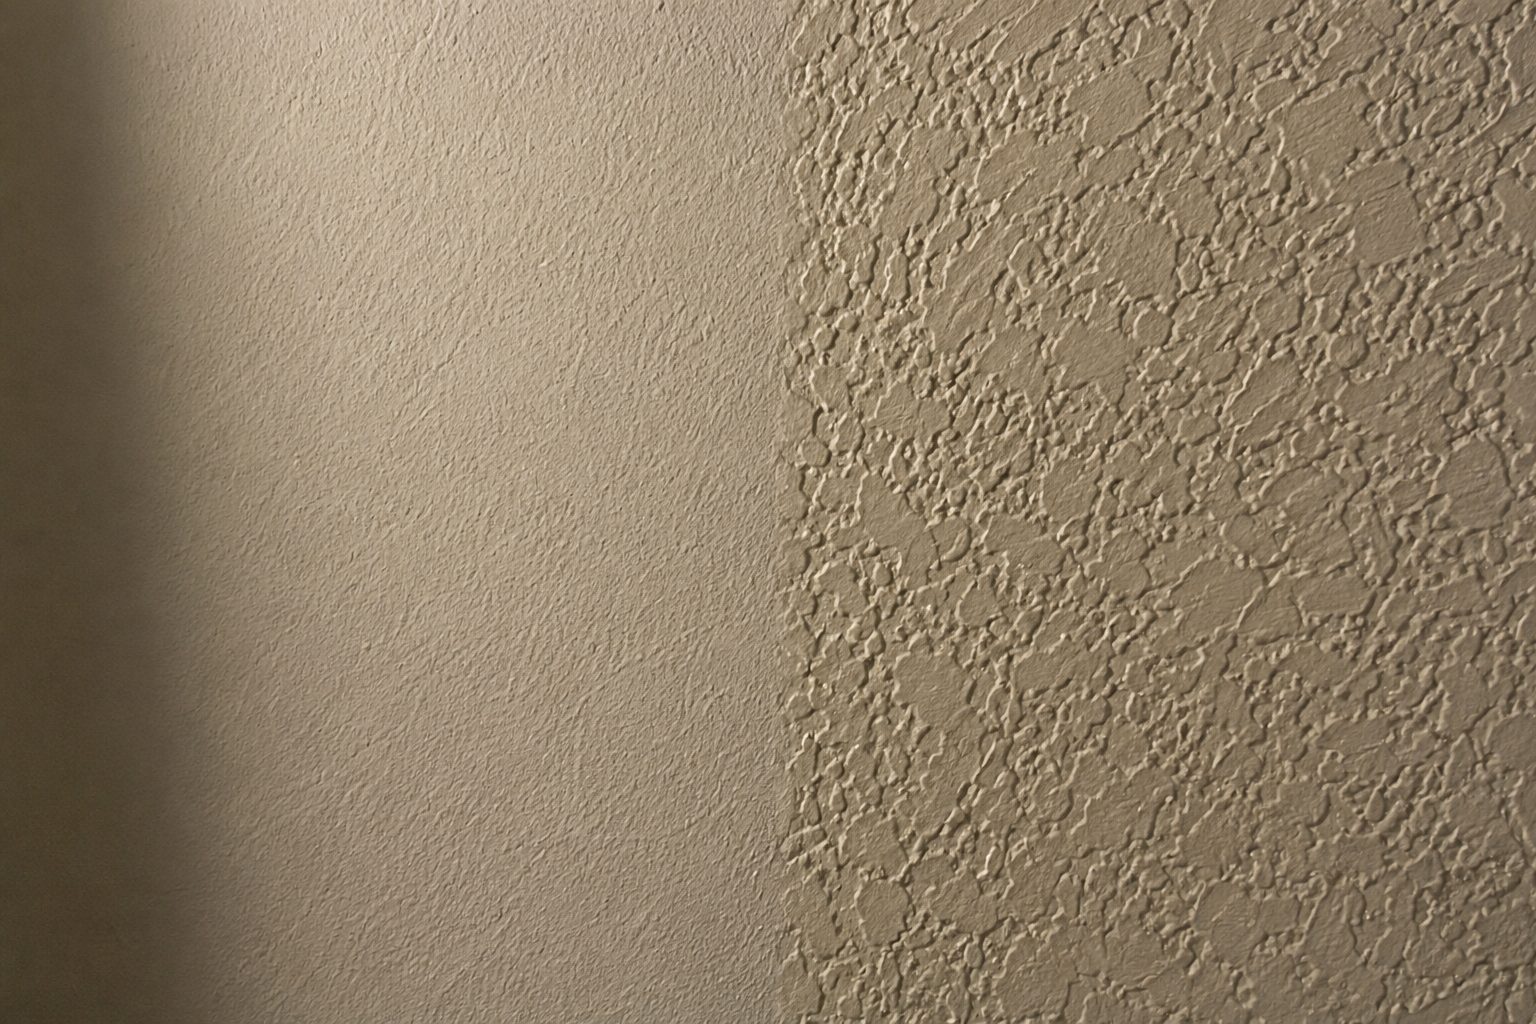
Textured walls are the norm in a lot of homes, from light orange-peel drywall to heavier knockdown finishes, and it's one of the most common reasons people hesitate before buying a wall decal. The short answer is yes, vinyl decals can work on textured walls — but the outcome depends heavily on how deep the texture is and how much care you put into the application. Here's how to tell if your wall is a good candidate, and the techniques that make the biggest difference when it isn't perfectly smooth.

Vinyl wall decal applied smoothly to a lightly textured wall
A few ideas to get you started
  • Light textures like orange peel and knockdown generally work fine with standard vinyl decals.
  • Heavier textures (deep knockdown, stucco, popcorn) are much harder for vinyl to conform to and often lead to lifting edges.
  • Cleaning, drying, and gently warming the wall before application significantly improves adhesion on texture.
  • Applying heat during installation helps vinyl mold into small bumps and grooves.
  • Lifted edges on textured walls should be fixed quickly with heat and pressure, or a small dot of repositionable adhesive.

1. Know Which Textures Work and Which Don't

Not all wall textures are equal when it comes to decals. Light, shallow textures like orange peel and knockdown are generally manageable, since the bumps are small enough for vinyl to press into with some effort. Heavier or deeper textures — thick stucco, popcorn ceilings, deep knockdown, or raw brick and concrete block — are much tougher, because the peaks and valleys are too pronounced for a thin vinyl layer to fully conform to. Painted concrete block tends to do better than raw block, since paint smooths out some of the surface irregularity.

WHY IT WORKS

Matching your expectations to your actual wall texture prevents frustration and helps you decide whether standard application techniques will be enough, or whether you'll need extra steps.

STYLING TIP

Run your hand across the wall — if you can barely feel the bumps with your palm, it's a good candidate; if you can clearly feel ridges or valleys, plan on extra effort.

2. Clean and Prep the Surface Extra Carefully

Textured walls trap dust in their crevices more easily than smooth ones, so a quick wipe-down usually isn’t enough. Clean the wall with a damp cloth, working into the texture, and let it dry fully — this can take longer than it would on a flat surface, especially in humid conditions. Skipping this step is one of the fastest ways to end up with lifted edges later, since dust in the grooves prevents the adhesive from making full contact.

WHY IT WORKS

Textured surfaces have more hidden surface area for dust and residue to collect in, so thorough prep matters even more than it does on smooth drywall.

STYLING TIP

Let the wall air dry for longer than you think you need to — trapped moisture in texture grooves is a common cause of poor adhesion.

3. Use Heat to Help the Vinyl Conform

A hair dryer or heat gun on a low-to-moderate setting can make a real difference on textured walls. Gently warming the decal as you press it into place softens the vinyl slightly, helping it mold into small bumps and grooves instead of bridging over them, which is what causes lifting later. Work in small sections, applying heat for a few seconds and then pressing firmly with a squeegee or your fingers before moving to the next area.

WHY IT WORKS

Warm vinyl is more pliable and better able to follow the contours of an uneven surface, which improves contact with the adhesive and reduces the chance of edges peeling up over time.

STYLING TIP

Keep the heat source moving constantly and hold it a few inches away — concentrated heat in one spot can warp the vinyl or affect the print.

4. Press Firmly and Work in Small Sections

On textured walls, working in small sections matters even more than usual. Peel back just an inch or two of the backing at a time, press that section firmly with a squeegee or the edge of a card, and move on. For deeper texture, going over each section two or three times with firm, even pressure helps push the vinyl further into the grooves rather than letting it sit on top of the high points only.

WHY IT WORKS

Repeated, firm pressure over small areas gives the adhesive more opportunities to fully contact the low points of the texture, not just the raised surface.

STYLING TIP

A firm plastic squeegee generally works better than a soft cloth on texture, since it can apply more concentrated pressure into the low spots.

5. Fix Lifted Edges Quickly

Even with careful application, small edges or corners can lift on textured walls over the following days, especially around deeper grooves. Catch this early: warm the lifted section with a hair dryer for about 20 seconds and press it firmly back into place. If it still won’t hold, a very small amount of repositionable craft glue applied under the edge with a toothpick can secure it without damaging the decal. Avoid touching or adjusting the decal unnecessarily for the first 24 hours while the adhesive continues to bond.

WHY IT WORKS

Addressing lifted edges immediately prevents them from getting worse, and full adhesive strength typically isn't reached for a couple of days, so early support helps the bond set properly.

STYLING TIP

Check corners and edges once a day for the first few days after installation, since that's when most texture-related lifting shows up.

6. Consider Fabric-Style Decals for Heavier Texture

If your wall has a pronounced texture and standard vinyl still isn’t holding well after trying the techniques above, a softer, more pliable decal material can be worth exploring. Fabric-style, repositionable decals tend to flex more easily across uneven surfaces than stiffer vinyl, which can make them a better match for walls with deeper grooves or bumps. Availability of specific materials varies by product, so check individual listings for material options.

WHY IT WORKS

Softer, more flexible decal materials can follow the contours of a textured wall more readily than rigid vinyl, reducing the lifting that heavier textures tend to cause.

STYLING TIP

If you're unsure which material will suit your wall, testing on a small, inconspicuous section first can save you from a larger redo.

A Few More Things to Keep in Mind

Avoid applying decals to freshly painted textured walls — give the paint at least 30 days to fully cure first, since curing paint can prevent proper adhesion. Keep the area dry after installation, since moisture is especially problematic in the crevices of textured surfaces. And if a wall has extremely heavy or deep texture, it’s worth testing a small, inexpensive decal or an inconspicuous spot before committing to a large design.

Frequently Asked Questions
Can vinyl decals stick to textured walls?

Yes, in most cases, though it depends on how deep the texture is. Light textures like orange peel and knockdown generally work well with some extra care, while heavier textures like deep stucco or popcorn finishes are much more challenging for vinyl to conform to.

Will decals fall off textured walls over time?

They can, especially at edges and corners on heavier textures, if the wall wasn’t properly cleaned and prepped or if heat wasn’t used during application. Catching and fixing any lifting early usually prevents it from spreading.

Does using a hair dryer really help decals stick to textured walls?

Yes — gentle heat softens the vinyl slightly, making it more pliable so it can press into small bumps and grooves rather than bridging over them, which improves overall adhesion.

Are fabric decals better than vinyl for textured walls?

Fabric-style, repositionable decals tend to be more flexible than standard vinyl, which can help them conform to uneven surfaces more easily. Whether this is the better choice depends on the specific product and how deep your wall’s texture is.

How long should I wait after texturing or painting a wall before applying a decal?

It’s best to wait at least 30 days after painting or texturing before applying a decal, since the surface needs time to fully cure for the adhesive to bond properly.

What should I do if a decal's edge starts lifting on a textured wall?

Address it right away — warm the lifted section with a hair dryer for about 20 seconds and press it firmly back into place. If it still won’t hold, a small dot of repositionable craft glue under the edge can help secure it.
READY TO UPDATE YOUR WALLS?

Not sure which decal will work best on your wall? Browse our wall decal collection and check individual product details for material options suited to your surface.

Explore designs

Posted on

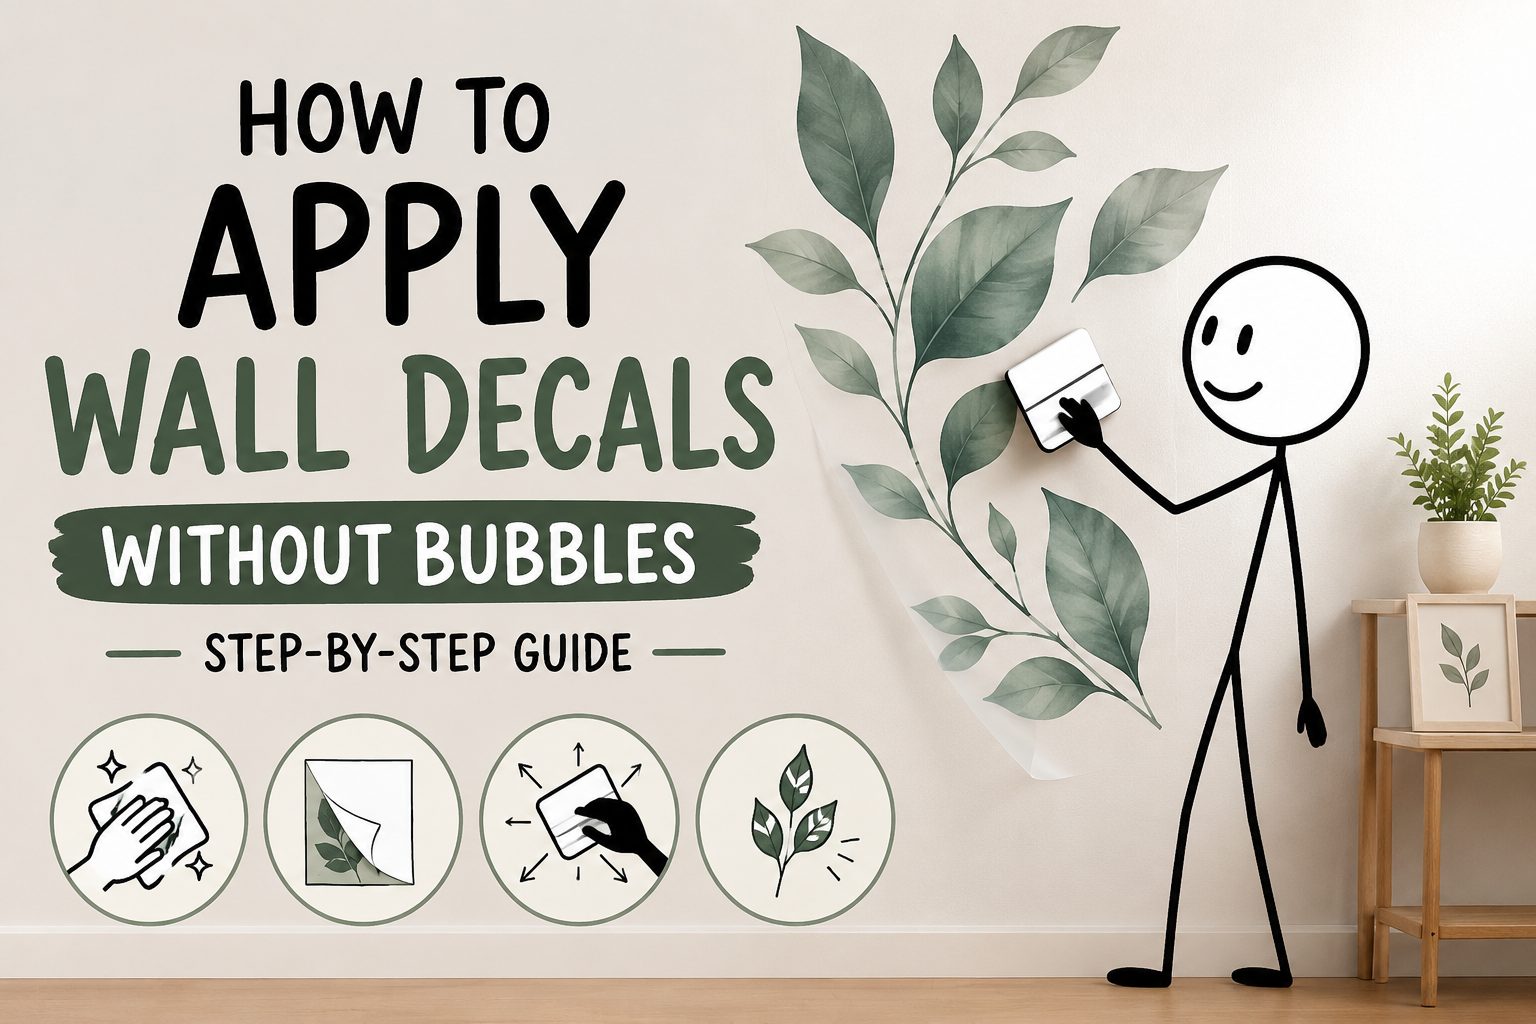
How to Apply Wall Decals Without Bubbles (Step-by-Step Guide)

Applying a wall decal smoothly without bubbles using a squeegee
how to

How to Apply Wall Decals Without Bubbles (Step-by-Step Guide)

Air bubbles are the most common complaint people have after installing a wall decal, and almost all of them come down to the same few causes: a wall that wasn’t fully clean or dry, rushing the backing removal, or pressing from the wrong direction. None of these are hard to avoid once you know what to watch for. This guide walks through the full process, from prepping the wall to smoothing out the last stubborn air pocket, so your decal goes on flat and stays that way.

Applying a wall decal smoothly without bubbles using a squeegee
A few ideas to get you started
  • Clean and fully dry the wall before doing anything else — dust and moisture are the top causes of bubbles.
  • Peel the backing off gradually instead of all at once, and press as you go.
  • Always smooth from the center of the decal outward toward the edges, never edge to edge.
  • A squeegee, credit card, or similar flat tool gives better results than your hand alone.
  • Small bubbles that remain after installation can usually be popped with a pin and pressed flat.

1. Clean and Dry the Wall Thoroughly

Start by wiping the wall down with a damp microfiber cloth to remove dust, grease, and any residue, then let it dry completely — this can take longer than expected depending on humidity. Even small amounts of dust act like tiny bumps under the decal, and moisture prevents the adhesive from bonding properly, both of which lead to bubbles later. If the wall was recently painted, wait at least two to three weeks before applying a decal, since fresh paint continues to off-gas and cure during that time.

WHY IT WORKS

A clean, dry, fully-cured surface gives the adhesive an even bonding surface with nothing trapped underneath.

STYLING TIP

Avoid using soap-based cleaners on the wall right before application — plain water is usually enough and won’t leave a residue that affects adhesion.

2. Plan and Mark the Placement Before Peeling Anything

Decide on the exact position before you expose any adhesive. Hold the decal up to the wall, or tape it lightly in place, and step back to check the placement from a distance. Use a level along one edge to make sure it’s straight, and lightly mark the position with a pencil if it’s a large or multi-piece decal. This step matters because most decals are difficult to reposition once fully applied, and rushing placement is one of the main reasons people end up redoing the whole job.

Cleaning a wall with a microfiber cloth before applying a wall decal
WHY IT WORKS

Confirming placement first avoids the biggest cause of do-overs and reduces the handling that can introduce dust or fingerprints under the adhesive.

STYLING TIP

Step back and view the taped decal from across the room, not just up close, since perspective changes how centered or level it looks.

3. Peel the Backing Gradually, Not All at Once

Rather than removing the entire paper backing before touching the decal to the wall, peel back only the first few inches, press that section into place, and then continue peeling and pressing in stages. This keeps the exposed adhesive from touching itself or picking up dust while you work, and gives you much more control over alignment as you go.

WHY IT WORKS

Working in small sections keeps you in control of the decal the whole time, which is where most bubbles and wrinkles are prevented rather than fixed after the fact.

STYLING TIP

For large decals, ask someone to help hold the unpeeled portion steady while you apply the exposed section.

4. Smooth from the Center Outward

As each section of the decal touches the wall, use a squeegee, credit card, or similar flat-edged tool to press it down, always working from the center of that section toward the edges. This pushes trapped air out ahead of the tool rather than sealing it in the middle. Use firm, even strokes rather than pressing especially hard in one spot, and go over each section more than once.

WHY IT WORKS

Air can only escape through an edge, so working outward from the center gives it somewhere to go instead of trapping it under the vinyl.

STYLING TIP

Wrap the squeegee edge in a soft cloth if you’re worried about scratching a textured or delicate decal surface.

5. Remove the Transfer Tape Slowly and at an Angle

If your decal uses a clear transfer film on top, wait until the whole design is fully pressed onto the wall before removing it. Peel it back slowly at a low, shallow angle rather than pulling straight up, and go one small section at a time. If any part of the decal starts lifting with the tape, stop, press it back down, and re-run the squeegee over that spot before continuing.

WHY IT WORKS

A shallow peeling angle keeps the adhesive bond between the decal and the wall stronger than the bond between the decal and the transfer tape, so the design stays put.

STYLING TIP

Peel toward yourself at a low angle rather than up and away — it gives you more control if a section needs to be pressed back down.

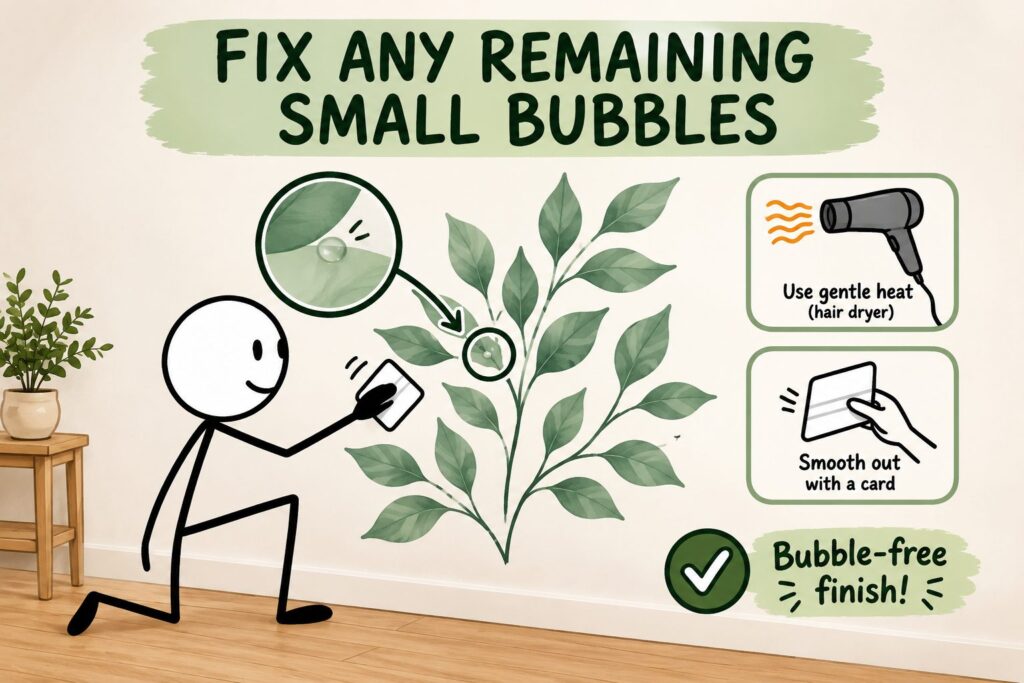
6. Fix Any Remaining Small Bubbles

If a small bubble is still visible after installation, don’t try to push it out toward the nearest edge, since that can wrinkle the decal. Instead, use a pin or fine needle to make a tiny puncture in the bubble, then press the air out gently with a fingertip or soft cloth. For a bubble that won’t flatten, a hair dryer on a low, warm setting can soften the vinyl slightly and make it easier to press down smoothly.

Marking wall decal placement with a level before applying
WHY IT WORKS

A pinprick lets trapped air escape without disturbing the surrounding design, and gentle heat makes vinyl more pliable so it settles flat.

STYLING TIP

Keep the hair dryer moving and on a low setting — concentrated heat can cause the vinyl to warp or the adhesive to overheat.

A Few More Things That Help

Apply decals in a room with moderate temperature and humidity — extreme heat or cold can affect how the adhesive behaves. Avoid textured or heavily uneven walls, since decals are designed for smooth surfaces and are more likely to bubble on stucco, brick, or heavily textured paint. And if you’re working with a large or multi-panel decal, having a second person to help hold and align sections makes a noticeable difference in the final result.

Frequently Asked Questions
Why do wall decals bubble after installation?

Bubbles usually come from dust or moisture trapped under the decal, peeling the backing off too quickly, or pressing from the edges inward instead of the center outward. Careful surface prep and a gradual application process prevent most bubbles from forming in the first place.

Can I fix a wall decal that already has bubbles?

Small bubbles can often be fixed with a pin prick to let the air out, followed by gentle pressure to flatten the spot. For a decal with many bubbles or wrinkles, it may be easier to carefully peel it up and reapply it using the center-outward smoothing method.

What tools do I need to apply a wall decal without bubbles?

A squeegee or a flat-edged tool like a credit card, a level, a pencil for marking placement, and a clean microfiber cloth for prepping the wall are usually all you need. A hair dryer can help with any stubborn bubbles afterward.

How long should I wait after painting before applying a wall decal?

It’s best to wait two to three weeks after painting. Fresh paint continues to cure during this time, and applying a decal too soon can lead to poor adhesion or paint pulling away later when the decal is removed.

Do wall decals work on textured walls?

Wall decals are designed for smooth, flat surfaces and generally don’t adhere well to heavily textured walls like stucco or popcorn ceilings, since the adhesive can’t make full contact with the surface. Lightly textured walls may work but are more prone to bubbling.

Can I reposition a wall decal once it’s on the wall?

Many decals can be gently peeled up and repositioned shortly after application, though this becomes harder the longer the adhesive has had to set. It’s best to confirm placement before applying rather than relying on repositioning.

READY TO UPDATE YOUR WALLS?

Ready to give a wall a fresh look? Browse our removable wall decal collection and follow this guide for a smooth, bubble-free application.

Explore designs

Posted on

7 Toddler Room Decor Ideas for 2026

Toddler bedroom decorated with 2026 trend colors, decals, and a reading nook
inspiration

7 Toddler Room Decor Ideas for 2026

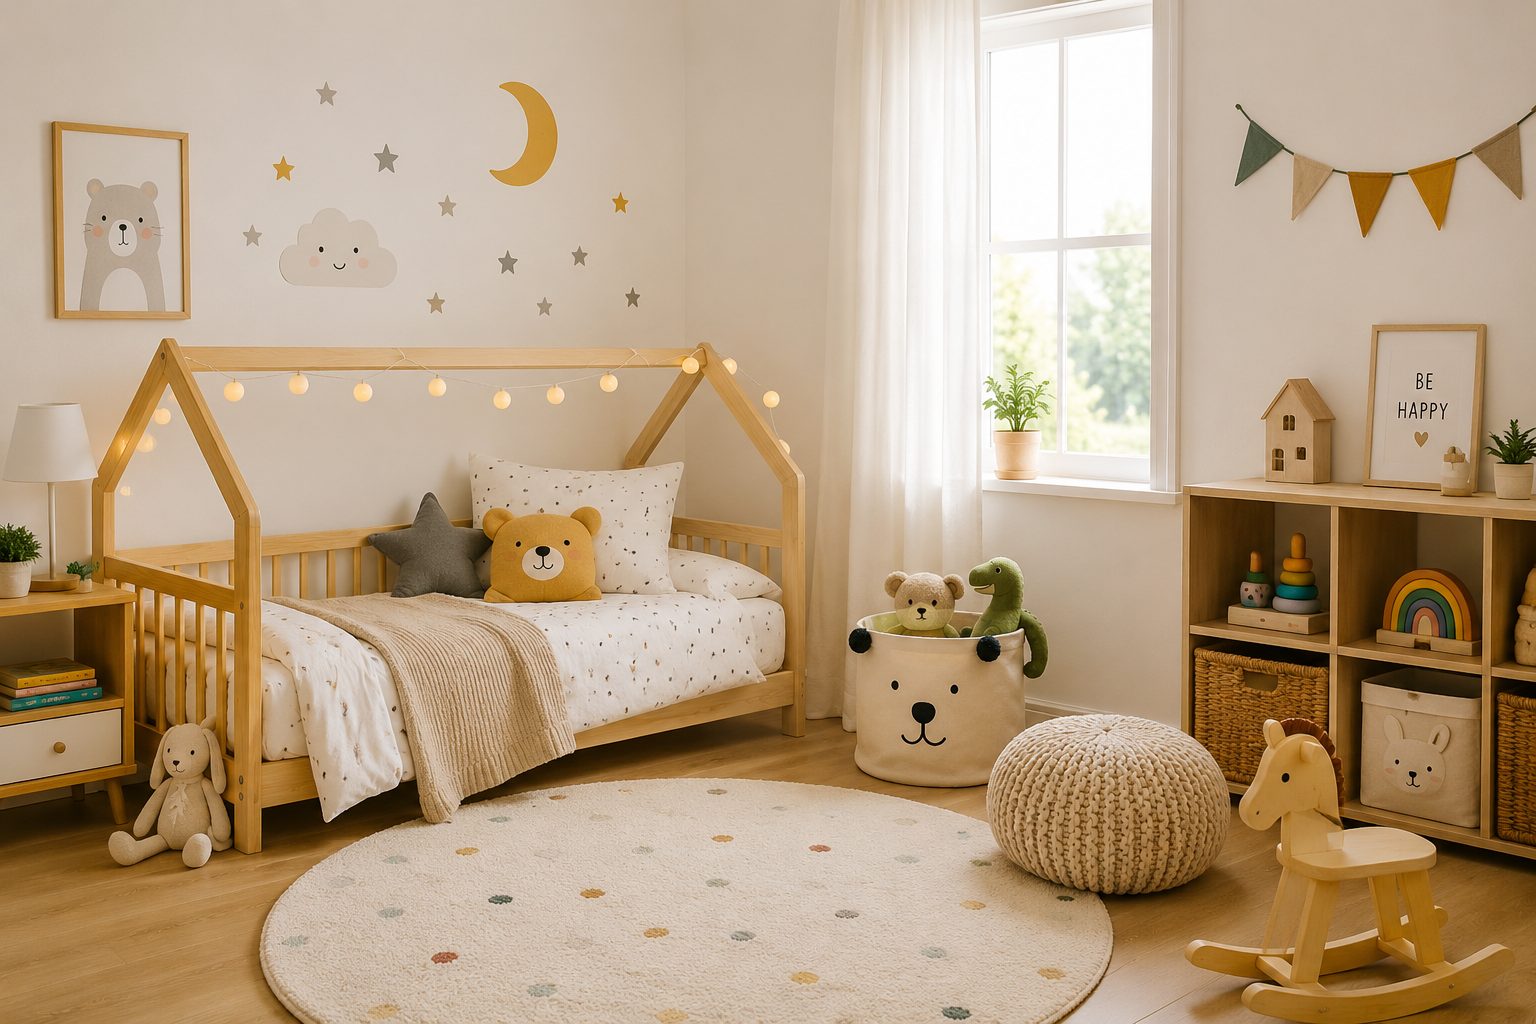
Toddler room decor in 2026 is less about picking a single cartoon theme and more about building a calm, flexible space that can flex with your child's changing interests. Parents are leaning into earthy, nature-inspired palettes, removable decor, and smart storage that supports independence — all while keeping safety front and center. Here are seven distinct, genuinely useful ideas for updating a toddler's room this year, from wall treatments to layout choices that actually make daily routines easier.

Toddler bedroom decorated with 2026 trend colors, decals, and a reading nook
A few ideas to get you started
  • Earthy, nature-inspired color palettes are replacing bright primary colors as the dominant 2026 trend.
  • Removable wall decals let you follow your toddler's interests without repainting or damaging walls.
  • Low, open storage supports toddler independence and easier daily cleanup.
  • Cozy reading and play nooks add function without cluttering the room.
  • Design choices should suit a 2–4 year window, not just this year's favorite theme.

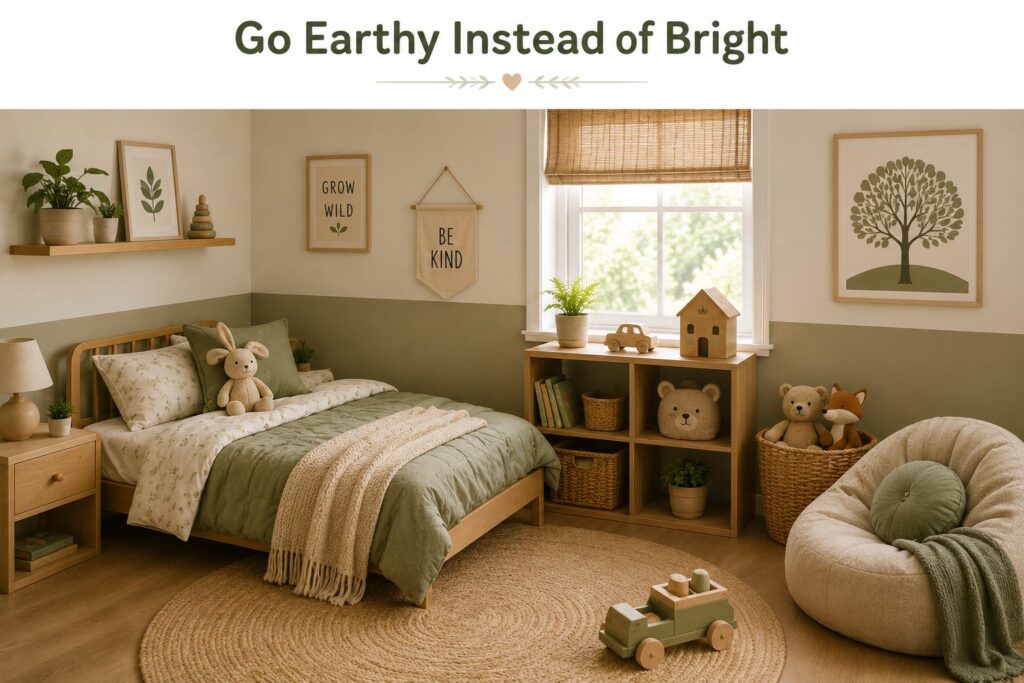
1. Go Earthy Instead of Bright

One of the clearest shifts in toddler room design this year is a move away from bold primary colors toward grounded, nature-inspired tones — sage green, terracotta, warm clay, muted olive, and soft beige. These shades feel calming rather than stimulating, which can help with winding down at bedtime, and they age well as your toddler grows into a bigger kid room. You don’t need to repaint the whole room to get this effect; even swapping bedding, rugs, and a few decor pieces into these tones can shift the whole feel of the space.

WHY IT WORKS

Softer, earthy palettes create a more restful atmosphere for sleep and are far less likely to feel dated or 'too babyish' within a year or two.

STYLING TIP

Pair a sage or clay wall with warm wood furniture and cream textiles for a cohesive, grown-with-you look.

Toddler bedroom decorated in earthy sage green and warm neutral tones

2. Add an Accent Wall with Removable Decals

Instead of a full mural or wallpaper commitment, many parents are using removable wall decals to create a focal accent wall behind the crib or toddler bed. Decals can be arranged in a cluster — animals, botanicals, simple shapes — and swapped out later as your toddler’s interests change, without needing to touch up paint or patch holes. This works especially well in rentals or rooms you don’t want to fully repaint.

WHY IT WORKS

Decals deliver the visual impact of a themed wall while keeping the room adaptable and low-commitment as your toddler's tastes evolve.

STYLING TIP

Cluster decals on one wall rather than spreading them around the room so the space still feels calm, not busy.

Toddler bedroom accent wall decorated with botanical and animal decals

3. Build in Toddler-Height Storage

Low, open storage — cube shelving, floor-level bins, accessible closet rods — lets toddlers get toys and clothes out and put them away themselves. This is less about aesthetics and more about function: it reduces daily friction and gives toddlers a chance to practice independence during cleanup and dressing.

WHY IT WORKS

Storage toddlers can actually reach supports independence and turns tidying into something they can participate in, rather than a task left entirely to parents.

STYLING TIP

Use picture labels on bins instead of text, since most toddlers aren't reading yet.

4. Create a Small Reading or Quiet Corner

A reading nook doesn’t need a built-in bench. A soft rug, a couple of floor cushions, and a low basket of board books tucked into a corner is enough to give your toddler a physical cue that this spot is for calmer, quieter activities — useful for winding down before naps or bedtime.

WHY IT WORKS

A dedicated quiet corner reinforces routine and gives toddlers an obvious, comforting place to settle down.

STYLING TIP

Keep the book basket at floor height so your toddler can choose books on their own.

5. Personalize the Space with a Name Decal

A name decal placed above the headboard or on a focal wall is a simple, low-effort way to make the room feel distinctly your toddler’s own. It works well as the single statement piece on an otherwise neutral wall, avoiding visual clutter while still adding a personal touch.

WHY IT WORKS

Personalization builds a sense of ownership over the space without requiring a full themed redesign.

STYLING TIP

Keep surrounding wall decor minimal so the name remains the clear focal point.

6. Prioritize Soft, Safe Materials and Secured Furniture

Safety considerations shape a lot of 2026 toddler room choices: low-VOC paints, rounded furniture edges, soft rugs for floor play, and furniture anchored to the wall. These aren’t decorative details, but they influence which decor and furniture choices make sense in the first place, especially since toddlers spend so much time playing on the floor.

WHY IT WORKS

Toddlers are physically exploring their environment constantly, so safe materials and secured furniture reduce risk without limiting how the room looks.

STYLING TIP

Choose furniture with rounded corners and always anchor tall pieces like dressers and bookshelves to the wall.

7. Design for a 2–4 Year Window, Not Just This Year

Toddler interests shift quickly, so it’s worth choosing furniture and large decor pieces that can carry your child from toddlerhood into early school age, rather than committing fully to a single trend. Keep the big-ticket items (bed, dresser, rug) neutral and flexible, and let smaller, inexpensive pieces — decals, bedding, artwork — carry the current theme. That way, updating the room later means swapping a few items instead of starting over.

WHY IT WORKS

Planning for longevity saves money and effort down the road, since only the smaller decor layer needs to change as your child's tastes evolve.

STYLING TIP

Before buying anything themed, ask whether it will still make sense in two years — if not, look for a removable version instead.

Quick Tips for Updating a Toddler Room on a Budget

Start with the wall behind the bed, since it has the biggest visual impact for the least effort. Swap out small textiles like pillowcases and curtains before considering new furniture. Use removable decals for any ‘trendy’ element you’re not sure will last, and save paint changes for neutral, long-term colors rather than trend colors.

Frequently Asked Questions
What is the best color palette for a toddler room in 2026?

Earthy, nature-inspired tones like sage green, terracotta, clay, and warm beige are trending in 2026. These palettes feel calming and tend to age better than bright primary colors as your toddler grows.

Are wall decals safe for toddler rooms?

Removable wall decals are generally a low-risk decor option since they don’t involve paint fumes or permanent wall damage. As with any decor, keep decals out of reach if your toddler tends to pull at things, and follow the manufacturer’s placement guidance.

How do I decorate a toddler room without it looking cluttered?

Limit themed decor to one or two focal areas, like an accent wall or a single shelf display, and keep the rest of the room neutral. A few well-chosen pieces usually read as more intentional than many small themed items scattered throughout the room.

Should I choose a themed toddler room or a neutral one?

A neutral base with swappable themed accents (decals, bedding, art) tends to work better long-term than a fully themed room, since toddler interests change quickly and a neutral foundation is easier and cheaper to update.

How can I make toddler room storage more toddler-friendly?

Use low, open shelving and floor-level bins your toddler can reach without help. Picture labels instead of text labels make it easier for toddlers to find and return items independently.

Do I need to remove all wall decals when my toddler outgrows a theme?

Not necessarily — many decal styles can be repositioned or swapped individually rather than removed all at once, so you can update a room gradually as interests change rather than doing a full redecoration.

READY TO UPDATE YOUR WALLS?

Looking to refresh your toddler's room? Explore our collection of removable wall decals designed to add personality without the commitment of paint.

Explore designs

Posted on

Never Use These Home Decor Items

home decor items to avoid

Decor to Avoid for a High-Vibe Home

Your home is more than just a roof over your head; it’s your energetic sanctuary. The items you surround yourself with—the textures, the colors, and even the history behind them—can profoundly influence the atmosphere, impacting your mood, sleep, relationships, and even your prosperity.

While many decor decisions are based purely on aesthetics and practicality, ancient wisdom traditions like Feng Shui, Vastu Shastra, and varying mystical beliefs suggest that the unseen energy, or “Chi,” of an object matters just as much as its appearance. Some items act as conductors for negativity, stagnation, or misfortune. They create subtle blockages that can make you feel perpetually tired, anxious, or unable to make progress in life.

If your home feels perpetually “heavy” or “off,” and simple cleaning hasn’t helped, it might be time to conduct an energy audit. Understanding what to remove is sometimes more powerful than deciding what to add.

Here are several that traditions advise skipping in order to cultivate a high-vibe, positive home environment. So you must prioritize and avoid these home decor items to avoid negative energy.

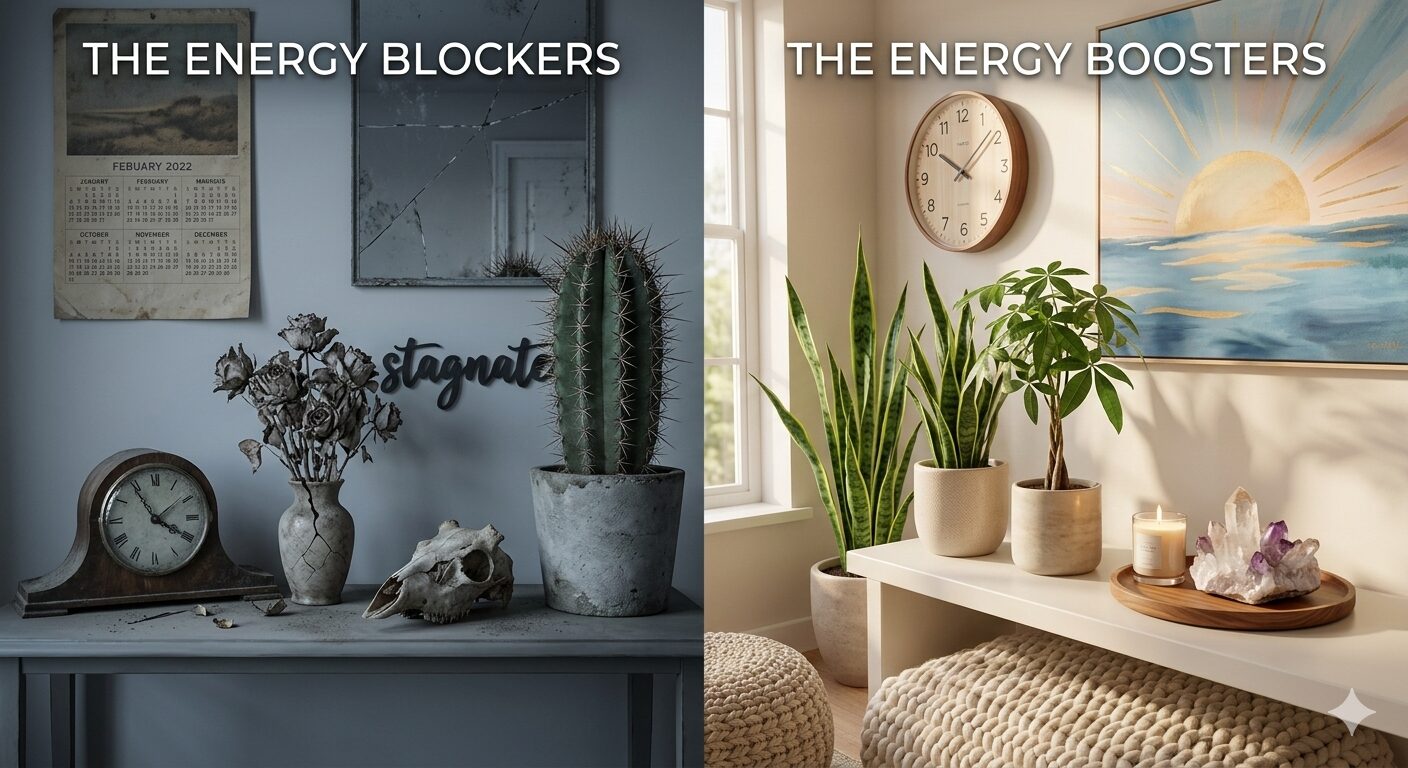
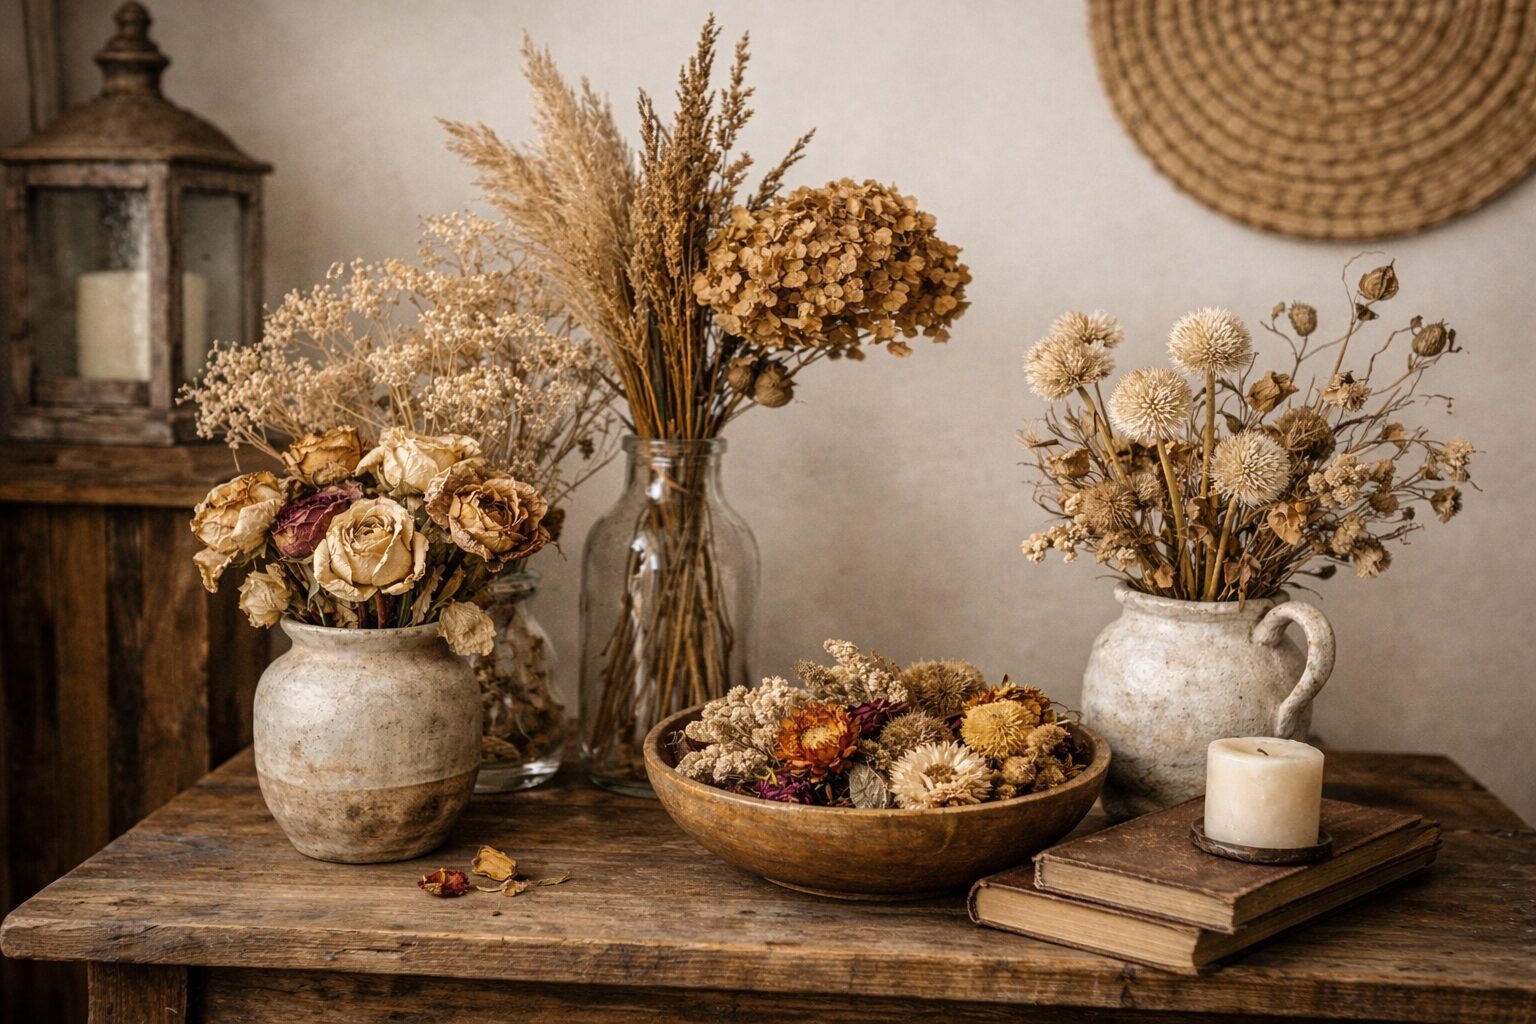
Dead and Dried Flowers

Dried flowers—including trends like pampas grass—are a massive design staple. However, energetically, they are highly problematic. When you display something that was once alive but is now permanently withered, it radiates Yin (stagnant/death) energy.

The Fix: Prioritize thriving, living plants (like the ‘Money Tree’ or ‘Snake Plant’). If living things struggle in your home, high-quality, vibrant silk plants are a vast improvement over actual dead flora.

The Spiritual Risk: Instead of inspiring fresh starts, these items are thought to “suck the life” out of a room. Keeping dead items keeps your mind anchored in the past. It blocks you from moving forward and often indicates a subconscious inability to “let go.”

Broken or Stopped Clocks

In many cultural beliefs, time is symbolic of life’s forward motion. A clock that is no longer ticking is not a useful antique; it is an energetic barrier that symbolizes life on stasis or stalling.

The Spiritual Risk: A stopped clock is said to block progress in your career and impede personal growth. It anchors the household in old problems. An eerie old superstition even links the sudden, spontaneous chiming of a broken clock to a dire omen for the household.

The Fix: Immediately fix or replace the batteries in stopped clocks. If they are beyond repair and have sentimental value, store them outside the living space or give them away. Time should always be moving forward.

Cacti and Sharp Objects

Feng Shui emphasizes the importance of soft, flowing energy (Yang). Sharp or pointy objects create “poison arrows“—direct channels of piercing, aggressive energy (known as Sha Chi) that shoot into a space. A cactus, which is essentially nothing but sharp points, is the ultimate vector for this vibe.

The Spiritual Risk: While visually cool and hardy, placing a sharp cactus in your living room or main entryway is said to invite conflict, arguments, and tension among those who live there. Your home should feel like a sanctuary, not an obstacle course.

The Fix: Use plants with soft, rounded leaves (like a Jade Plant). Roses are usually considered an exception, as the beauty of the flower balances the energy of the thorns.

Sad or Violent Artwork

The art you view daily acts as a mental “broadcast” from your subconscious. Every time you see an image, your brain processes the emotion it conveys. Art depicting war, shipwrecks, crying people, severe storms, or lonely, desolate landscapes keeps that specific vibration active in your home.

The Spiritual Risk: Vastu Shastra specifically advises against displaying scenes of strife, such as epic battle scenes from ancient texts, as they are believed to cause domestic rivalry and a lack of peace. These images broadcast chaos and low-vibration distress into your sanctuary.

The Fix: Choose artwork that reflects your desired reality: vibrant landscapes, scenes of connection, images of abundance, or abstracts with uplifting colors and smooth lines.

Expired Calendars and Stale Technology

Energy can only flow freely where there is space. Old calendars, expired bills, and obsolete, non-functioning electronics (like a graveyard of old phones, broken cords, and original box clutter) generate massive amounts of energetic stagnation.

The Spiritual Risk: An old calendar on the wall keeps your attention, unconsciously, in previous months or years. Clutter (and specifically broken clutter) blocks the arrival of new opportunities and prosperity. It signals to the universe that you are not prepared for anything fresh.

The Fix: Regularly purge obsolete items. Recycling electronic waste is essential for energetic and environmental hygiene. Keep your calendar current, indicating you are present and ready for new experiences.

Broken Mirrors and Cracked Glass

A mirror is viewed as a reflection of the soul and a portal for energy (Qi). A chipped mirror or shattered glass disrupts that portal and fragments the energy reflected into the space.

The Spiritual Risk: A fractured mirror is believed to distort your sense of self and split the ‘luck’ in the house. The common superstition of seven years’ bad luck for a broken mirror hints at this disruption of flow. In the Vastu tradition, keeping broken glass (even a cracked drinking cup) is directly linked to attracting poverty.

The Fix: Immediately discard broken mirrors and cracked glassware. Do not glue them back together; their energetic continuity is broken.

Too Many Heavy Antique/Estate Sale Furniture

This is nuanced. Antiques can bring depth and history to a home, but furniture that is dark, massive, imposing, or specifically carved with violent motifs can retain the energetic imprints of previous owners—often from times of great hardship.

The Spiritual Risk: If you fill a room with the heavy, dark oak dressers of someone who experienced significant sadness or financial ruin, you may subconsciously import that specific narrative into your own space. You may feel “heavy,” “stuck,” or inexplicably sad in that room.

The Fix: Moderation is key. If you are sensitive, only introduce antiques after energetically clearing them (e.g., using sage smoke). In Feng Shui, balance heavy antiques with light colors, mirrors to expand the space, and soft textures. Avoid pieces that were inherited from known, unhappy lineages.

Cultivating the Vibe: The Vision

When you consciously choose what enters your sanctuary, you create a space that nourishes you. The negative energy audit is not about having a perfectly minimal home, but an intentional one. Check out our shop for some interesting home decor items and wall decals for your home.

Posted on

Best Bathroom Wall Decor Ideas

bathroom wall decor ideas

Let’s be honest—bathrooms often get the least attention when it comes to home decor. You’ve carefully curated your living room and bedroom, but your bathroom walls? They’re either completely bare or have some kind of outdated looks that don’t create a spark in the eyes.

A boring or neglected bathroom can make the space feel uninviting, turning what should be a relaxing retreat into just another functional room. And if you have guests over, they’ll notice, too!

With the right bathroom wall decor ideas, you can transform your space effortlessly—whether you prefer modern minimalism, rustic charm, or bold statement pieces. In this guide, we’ll explore the best ways to decorate your bathroom walls.

Factors to consider before choosing bathroom wall decor

The right decor should not only match your style but also withstand the unique conditions of a bathroom. Here’s what you need to keep in mind:

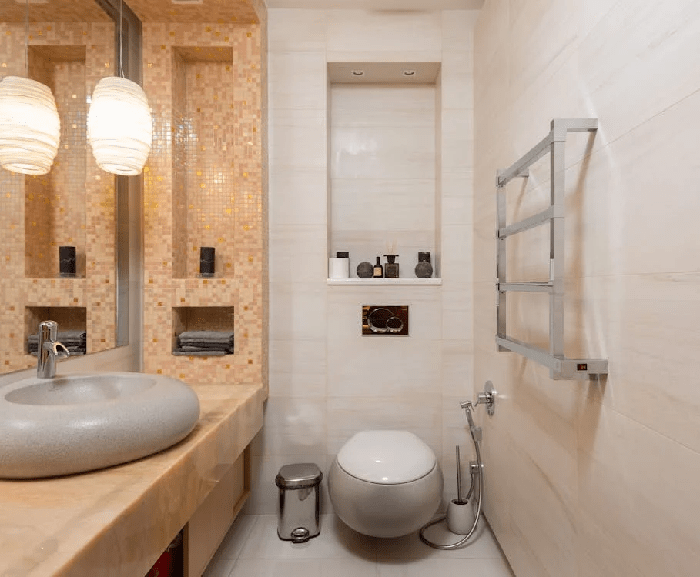
1. Moisture and Humidity Resistance

Bathrooms are high-moisture areas, which means any wall decor must be resistant to humidity and occasional splashes. Materials like metal, glass, ceramic, and waterproof prints work best. If you choose framed artwork or canvas prints, ensure they have protective coatings to prevent warping or mold growth.

2. Available Space and Layout

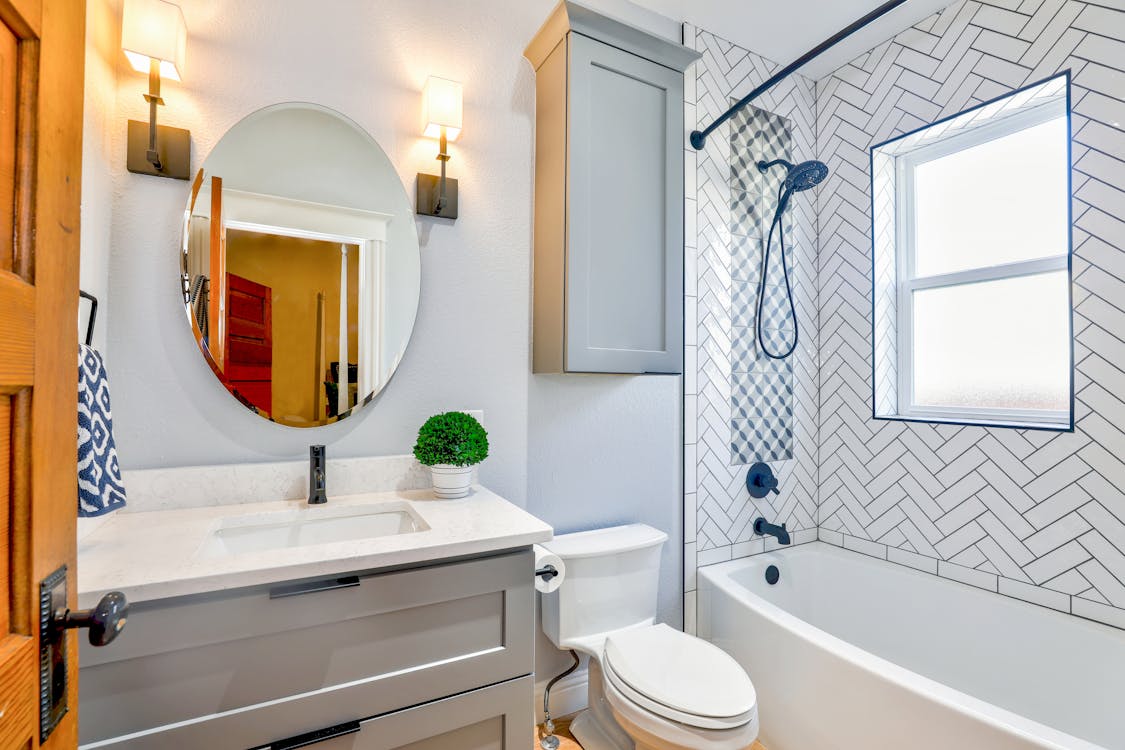
The size and layout of your bathroom play a crucial role in selecting wall decor. For small bathrooms, opt for minimalist designs like floating shelves or vertical artwork to avoid clutter. For larger bathrooms, consider creating a feature wall with tiles, wallpaper, or oversized art pieces to make a bold statement.

bathroom space wall decor

3. Functionality vs. Aesthetic Appeal

Decor should be both stylish and practical. Floating shelves, towel racks, or mirrored cabinets add visual appeal while maximizing storage. If you have limited space, you may consider using multi-purpose decor elements like hanging baskets/shelves or magnetic organizers.

4. Personal Style and Theme

Your bathroom should reflect your overall home aesthetic. Whether you prefer a modern, rustic, minimalist, vintage, or boho look, ensure your wall decor complements the theme. For a spa-like feel, go for neutral tones, wooden accents, and greenery.

For a bold look, consider abstract art, geometric patterns, or textured wall panels. You can also match it with your bedroom wall decor ideas or theme for a better and complete look.

5. Budget and DIY Options

Bathroom decor can be expensive, but there are budget-friendly and DIY options. Consider peel-and-stick wallpaper, thrifted artwork, or handmade macrame wall hangings for a personalized touch without breaking the bank.

Best Bathroom Wall Decor Ideas

The right wall decor can enhance the ambiance, reflect your personal style, and even make your space feel larger and more inviting. Here are a few impressive bathroom wall decor ideas that will appeal your eyes.

Wall Art and Prints

One of the simplest ways to enhance your bathroom’s aesthetic is by incorporating wall art and framed prints. Whether you prefer nature-inspired artwork, abstract designs, vintage posters, or typography-based prints, the right artwork can instantly elevate your space and reflect your personality.

Since bathrooms are humid environments, it’s essential to select moisture-resistant artwork. Here are some great options:

  • Framed Waterproof Prints – Opt for sealed, water-resistant frames to prevent warping and damage.
  • Canvas Art with Protective Coating – These are durable and add a classy, museum-like feel.
  • Acrylic or Metal Wall Art – These materials are completely waterproof and easy to clean.
  • Vintage or Minimalist Posters – These can be framed or laminated for protection.
  • DIY Art Pieces – Hand-painted or digitally printed designs add a personal touch.

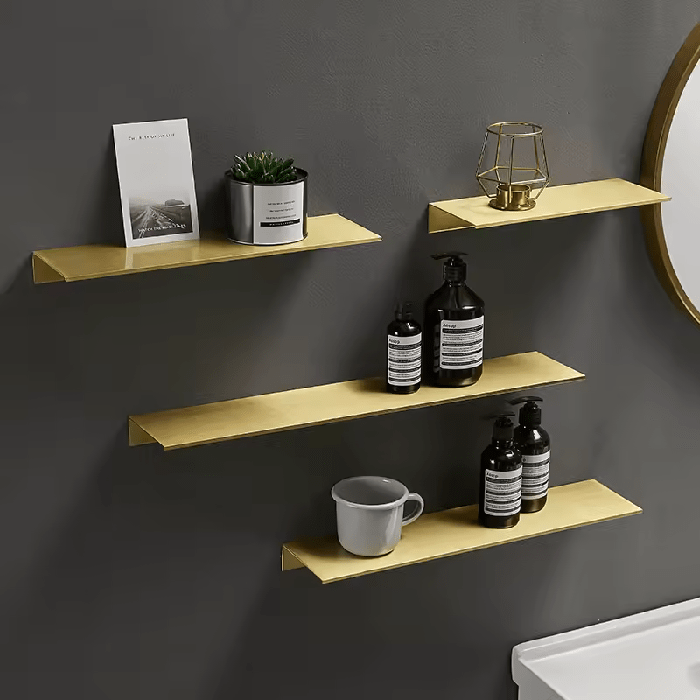
Floating Shelves and Storage Solutions

Floating shelves are a stylish and practical way to decorate your bathroom walls while adding much-needed storage. Whether you have a small bathroom that needs extra space or a larger bathroom that could use decorative accents, floating shelves provide a perfect balance between functionality and aesthetics.

Here are a few benefits of adding floating shelves in your bathroom:

  • Maximize Wall Space – Ideal for small bathrooms with limited storage.
  • Keep Essentials Organized – Store toiletries, towels, candles, and decor items neatly.
  • Enhance Aesthetic Appeal – Available in different materials and finishes to match your decor.
  • Easy to Install & Maintain – Simple to set up and requires minimal upkeep.

Types of Floating Shelves for Bathrooms

  • Wooden Floating Shelves – Perfect for rustic, farmhouse, or boho-style bathrooms. Opt for water-resistant wood like teak or bamboo.
  • Glass Shelves – Sleek and modern, glass shelves add an airy and minimalistic look while being moisture-resistant.
  • Metal Shelves – Durable and great for industrial or contemporary bathroom styles.
  • Corner Floating Shelves – Utilize empty corners for a space-saving solution.
  • Ladder Shelves – Leaning ladder shelves offer a trendy way to display towels and decor items.

Mirrors for Kitchen Decor

Mirrors are one of the most versatile and essential bathroom wall decor elements. Not only do they serve a functional purpose, but they also help enhance lighting, create the illusion of space, and elevate the overall aesthetic of your bathroom.

Types of Mirrors for Bathroom Wall Decor

  • Frameless Mirrors – A sleek, modern option that works well in contemporary and minimalist bathrooms.
  • Framed Decorative Mirrors – These are easily available in wood, metal, rattan, and antique finishes, adding character to your space.
  • Round & Oval Mirrors – Softens the overall look, making a bathroom feel more inviting and elegant.
  • Oversized Mirrors – Perfect for expanding small spaces and creating a luxurious feel.
  • Backlit LED Mirrors – Modern and functional, offering built-in lighting for a futuristic touch.
  • Double Vanity Mirrors – Ideal for shared bathrooms, providing symmetry and balance.
  • Vintage or Ornate Mirrors – Adds a classic or rustic touch with intricate designs.
  • Mirror Walls or Panels – Covering an entire wall with mirrors can dramatically increase brightness and space perception.

Peel and Stick Wall Decals

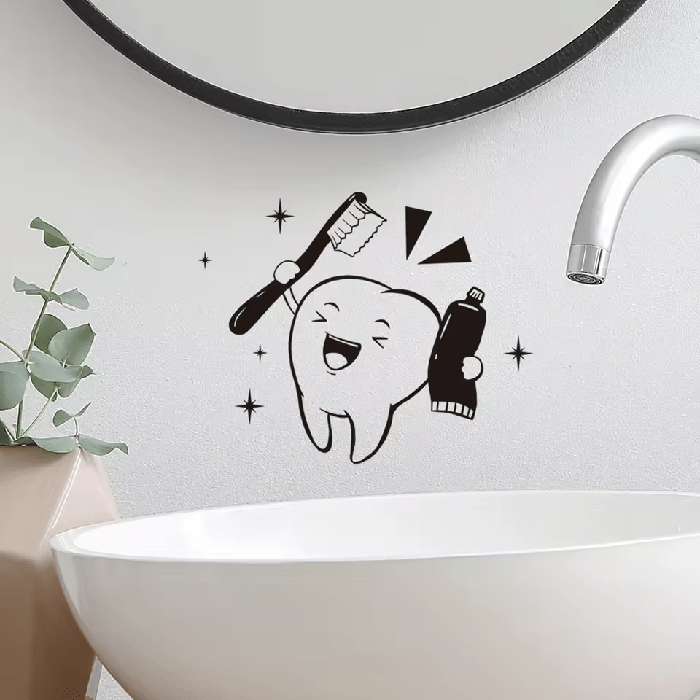
Wall decals or wall stickers are an easy, affordable, and renter-friendly way to transform your bathroom walls. These options allow you to experiment with different colors, textures, and patterns without committing to permanent changes.

Wall decals are useful because they are :

Easy to Apply & Remove – No need for professional installation; perfect for renters.
Water-Resistant & Durable – Many brands offer moisture-resistant designs suitable for bathrooms.
Endless Design Possibilities – From minimalist to bold patterns, there’s something for every style.
Budget-Friendly Makeover – Achieve a high-end look without expensive renovations.
Covers Imperfections – Ideal for hiding minor wall flaws or outdated tiles.

Peel-and-stick wallpaper and wall decals offer a simple yet stylish way to upgrade your bathroom without permanent changes. Check out our wall decals shop for a wide range of decal options.

Final Thoughts

Styling and maintaining bathroom wall decor is all about choosing durable materials, balancing aesthetics, and ensuring easy upkeep. By following these smart decorating and maintenance tips, you can create a bathroom space that is not only visually stunning but also long-lasting and practical. 🙂

Posted on

Best Bedroom Wall Decor Ideas 2026

We spent almost 1/3rd part of our lives sleeping, which means we spend almost a third of out time in our bedrooms. If that is some place where we spend a lot of time, decorating it and making it more elegant is not only a useful option, but our moral responsibility.

Check out this comprehensive guide that will tell you about the different types of bedroom wall decor ideas, along with several different items you can purchase to improve your bedroom decor.

What is a Bedroom Wall Decor?

As the name already suggest, a bedroom wall decor is some decorative piece put on the walls of your bedroom to enhance the living experience. It may help you feel more relaxed, funny, inspired, or any other feeling that it is appropriate for.

Bedroom wall decor items can solve a variety of purposes. They can be decorative objects that just soothe the eye, or they may also be a useful item such as a wall clock or a light that serves an additional purpose of making your daily life easier.

Either way, a bedroom wall decor is a great way to spruce up the look of your bedroom and elevate your living style.

Different Styles of Bedroom Wall Decor

Wall decorating ideas for bedroom can be classified into several different styles, such as:

  • Modern: Clean lines, abstract decor.
  • Rustic: Use of natural materials and metallic or earthy tones.
  • Bohemian: Eclectic mix of colors and textures.
  • Minimalist: Simple, uncluttered designs focusing on functionality.

What are some interesting types of Bedroom Wall Decor Items

Here are the most popular, useful, and interesting types of bedroom wall decor ideas that you can use. Remember, these are just the leading types and you can also use many different types of decor ideas as you please.

Wall Lights

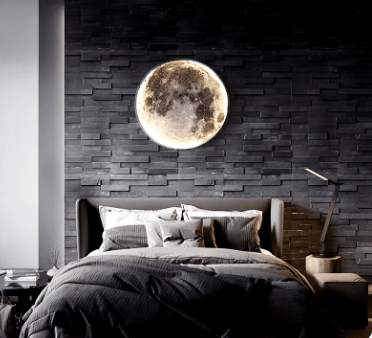
Wall lights are a fantastic way to elevate your bedroom decor while adding both functionality and style. Unlike traditional overhead lighting, wall-mounted fixtures bring a warm, inviting glow to your space, creating a cozy atmosphere perfect for relaxation.

They come in various designs, from sleek modern sconces to vintage-inspired lanterns, allowing you to choose pieces that reflect your personal aesthetic. One of the best aspects of wall lights is their versatility.

You can position them on either side of your bed for a balanced look, providing soft illumination for late-night reading or creating an intimate ambiance for unwinding after a long day.

Alternatively, placing them strategically around the room can highlight artwork or architectural features, transforming bare walls into captivating focal points.

Wall lights can save valuable floor space, making them ideal for smaller bedrooms where every inch counts. Plus, many lights have dimmable options available with them so you can adjust the mood and ambience of the lighting.

moon wall light

Wall Clock

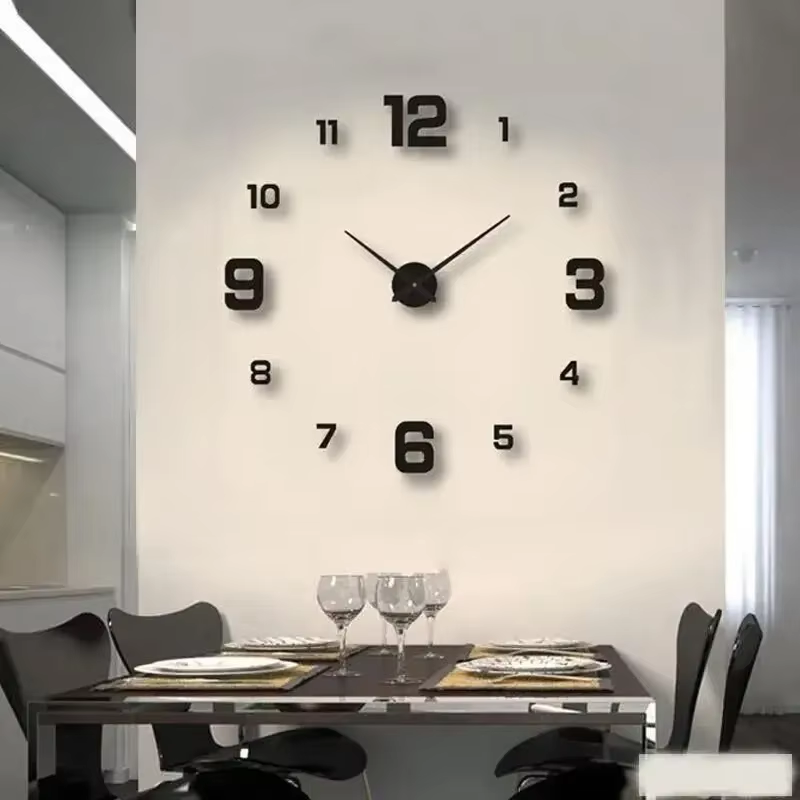
Wall clocks are more than just functional timekeepers; they can also serve as striking pieces of decor that enhance the personality of your bedroom. Whether you prefer a sleek modern design, a vintage-inspired piece, or an abstract art work, a wall clock can be found in almost every design these days.

Moreover, with so many styles and materials available, you can easily find a clock that complements your existing decor theme, whether it’s rustic, minimalist, or eclectic

Wall Decals

Wall decals are one of the most simple, inexpensive, but incredible decorative item for your walls. There are a ton of different wall decal categories such as Christmas Wall Decals, Dandelion Wall Decals, Nursery Wall Decals, and many more.

Wall decals can also be removable in design, which allows you to switch the wall they are on. Overall, wall decals and wall stickers are amazing decorative items for your bedroom, with a lot of different options to choose from.

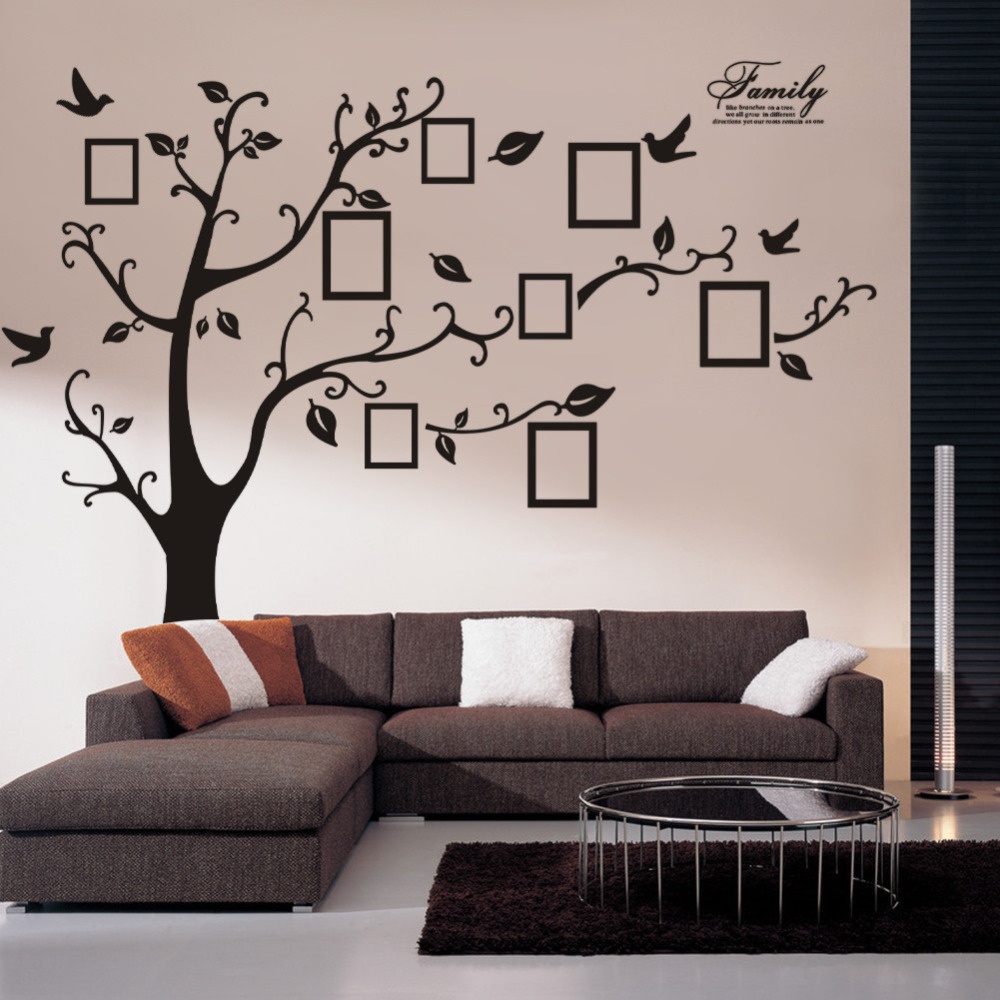
Tree Wall Murals

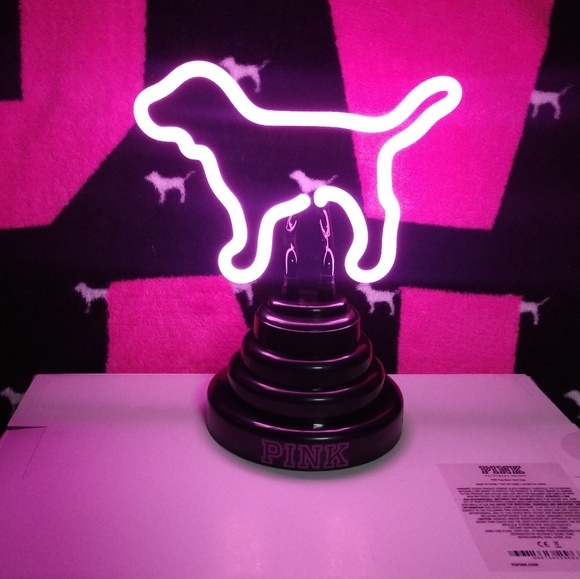
Neon Lights

Lighting is always a soothing medium to calm your senses, and a neon light with proper lighting in your room can be a relishing experience for you.

The best part with using neon lights is that they are available in a variety of different styles, and they can also be customized to suit your requirements.

Neon lights have a long lifespan and they are available in different colors to suit your ambience and moods. For example, this cute dog lamp below is an incredible neon light to de-stress after a long day of work and calm your senses while sitting on your table or laying on your bed.

dog neon light

Wall Tapestry

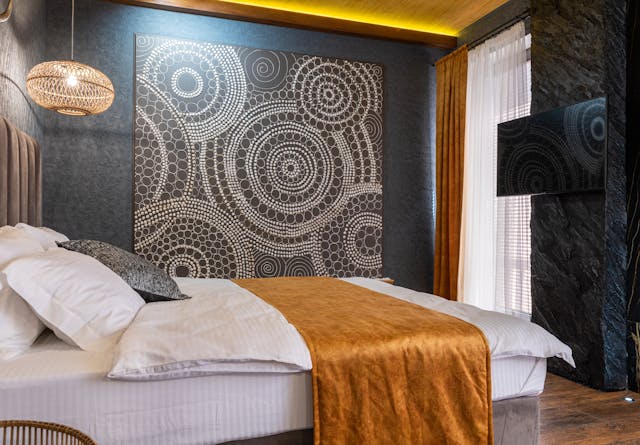
Tapestries are now coming back into fashion and they are an amazing way to decorate your bedroom. From enchanting tree of life to boho wall tapestries, these are a simple-in-design, but intricately developed decorative item.

A wall tapestry is usually placed in the bedroom or the living room. Either way, it allows you to look at a panel for inspiration, meditation, or introspection in your me-time.

DIY Paintings

DIY-Paintings are specially designed to be filled by one user. Also known as paint-by-numbers painting, these can be pre-designed or customized according to specifications. Your own DIY painting can be a great source of inspiration and self-esteem when you go to bed or wake up, giving you a sense of accomplishment.

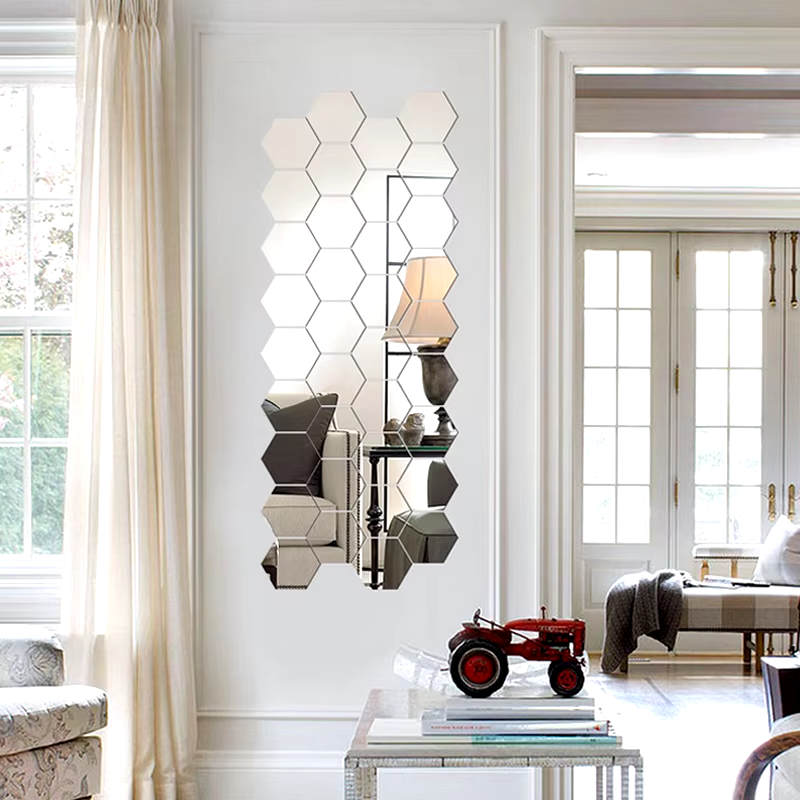
Mirrors

Mirrors are a neccessity for a bedroom, but they can also be a lovely decorative piece to enhance the beauty of the room. Starting from a range of highly expensive handcrafted designs to basic wall sticker mirrors, there are a lot of options to choose from.

Mirrors are said to ward off bad energy which makes them a good option for people who are interested in astrology, energy, and tarot topics. Either way, a mirror will be a great decorative idea for your bedroom.

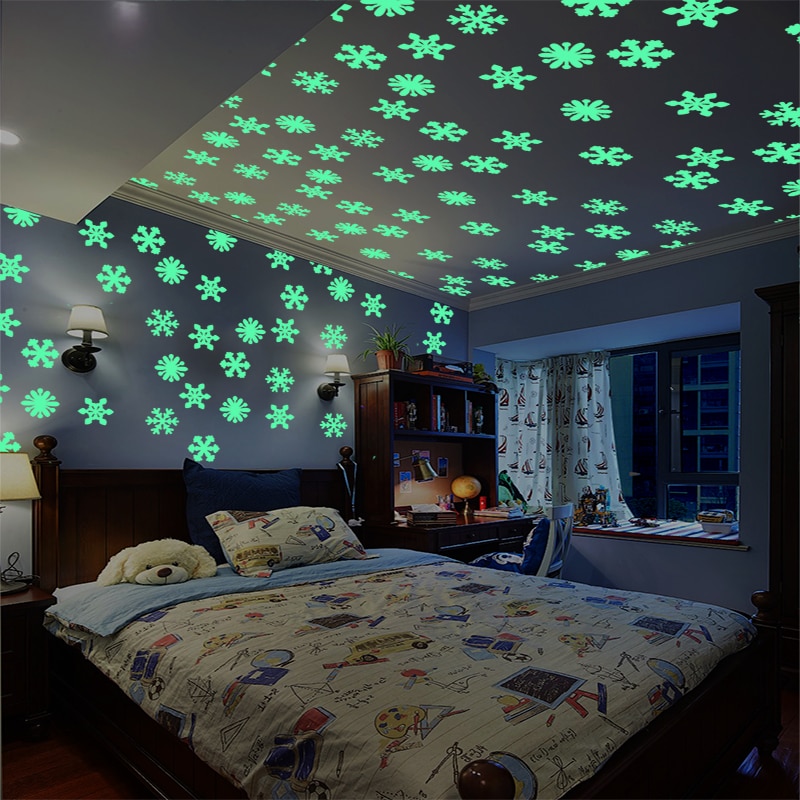
Luminous Wall Stickers

Convert your bedroom into a starry night with luminous stickers of stars, moon, and other objects that absorb light and light up when its completely dark in your room.

While it is an incredible option for kids bedroom, as adults, you can also use such stickers to get a lively, enchanting experience in your bedroom.

glow in dark snowflakes

Conclusion

A bedroom wall decor item will enhance your living experience for sure. Choosing the right item according to your interests will keep your mood light when you go to sleep, and keep it fresh when you awake back in the morning. At least for a few days unless it becomes are routing sight, haha.